Audience Builder
This feature may not be available in your version of Console depending on configuration.
The audience creation page in the Console gives users the flexibility to manually build various types of audiences based on audience logic they select. Once the mandatory fields have been completed, the user can either save a draft of the audience or save and publish it.
Building an Audience Manually
-
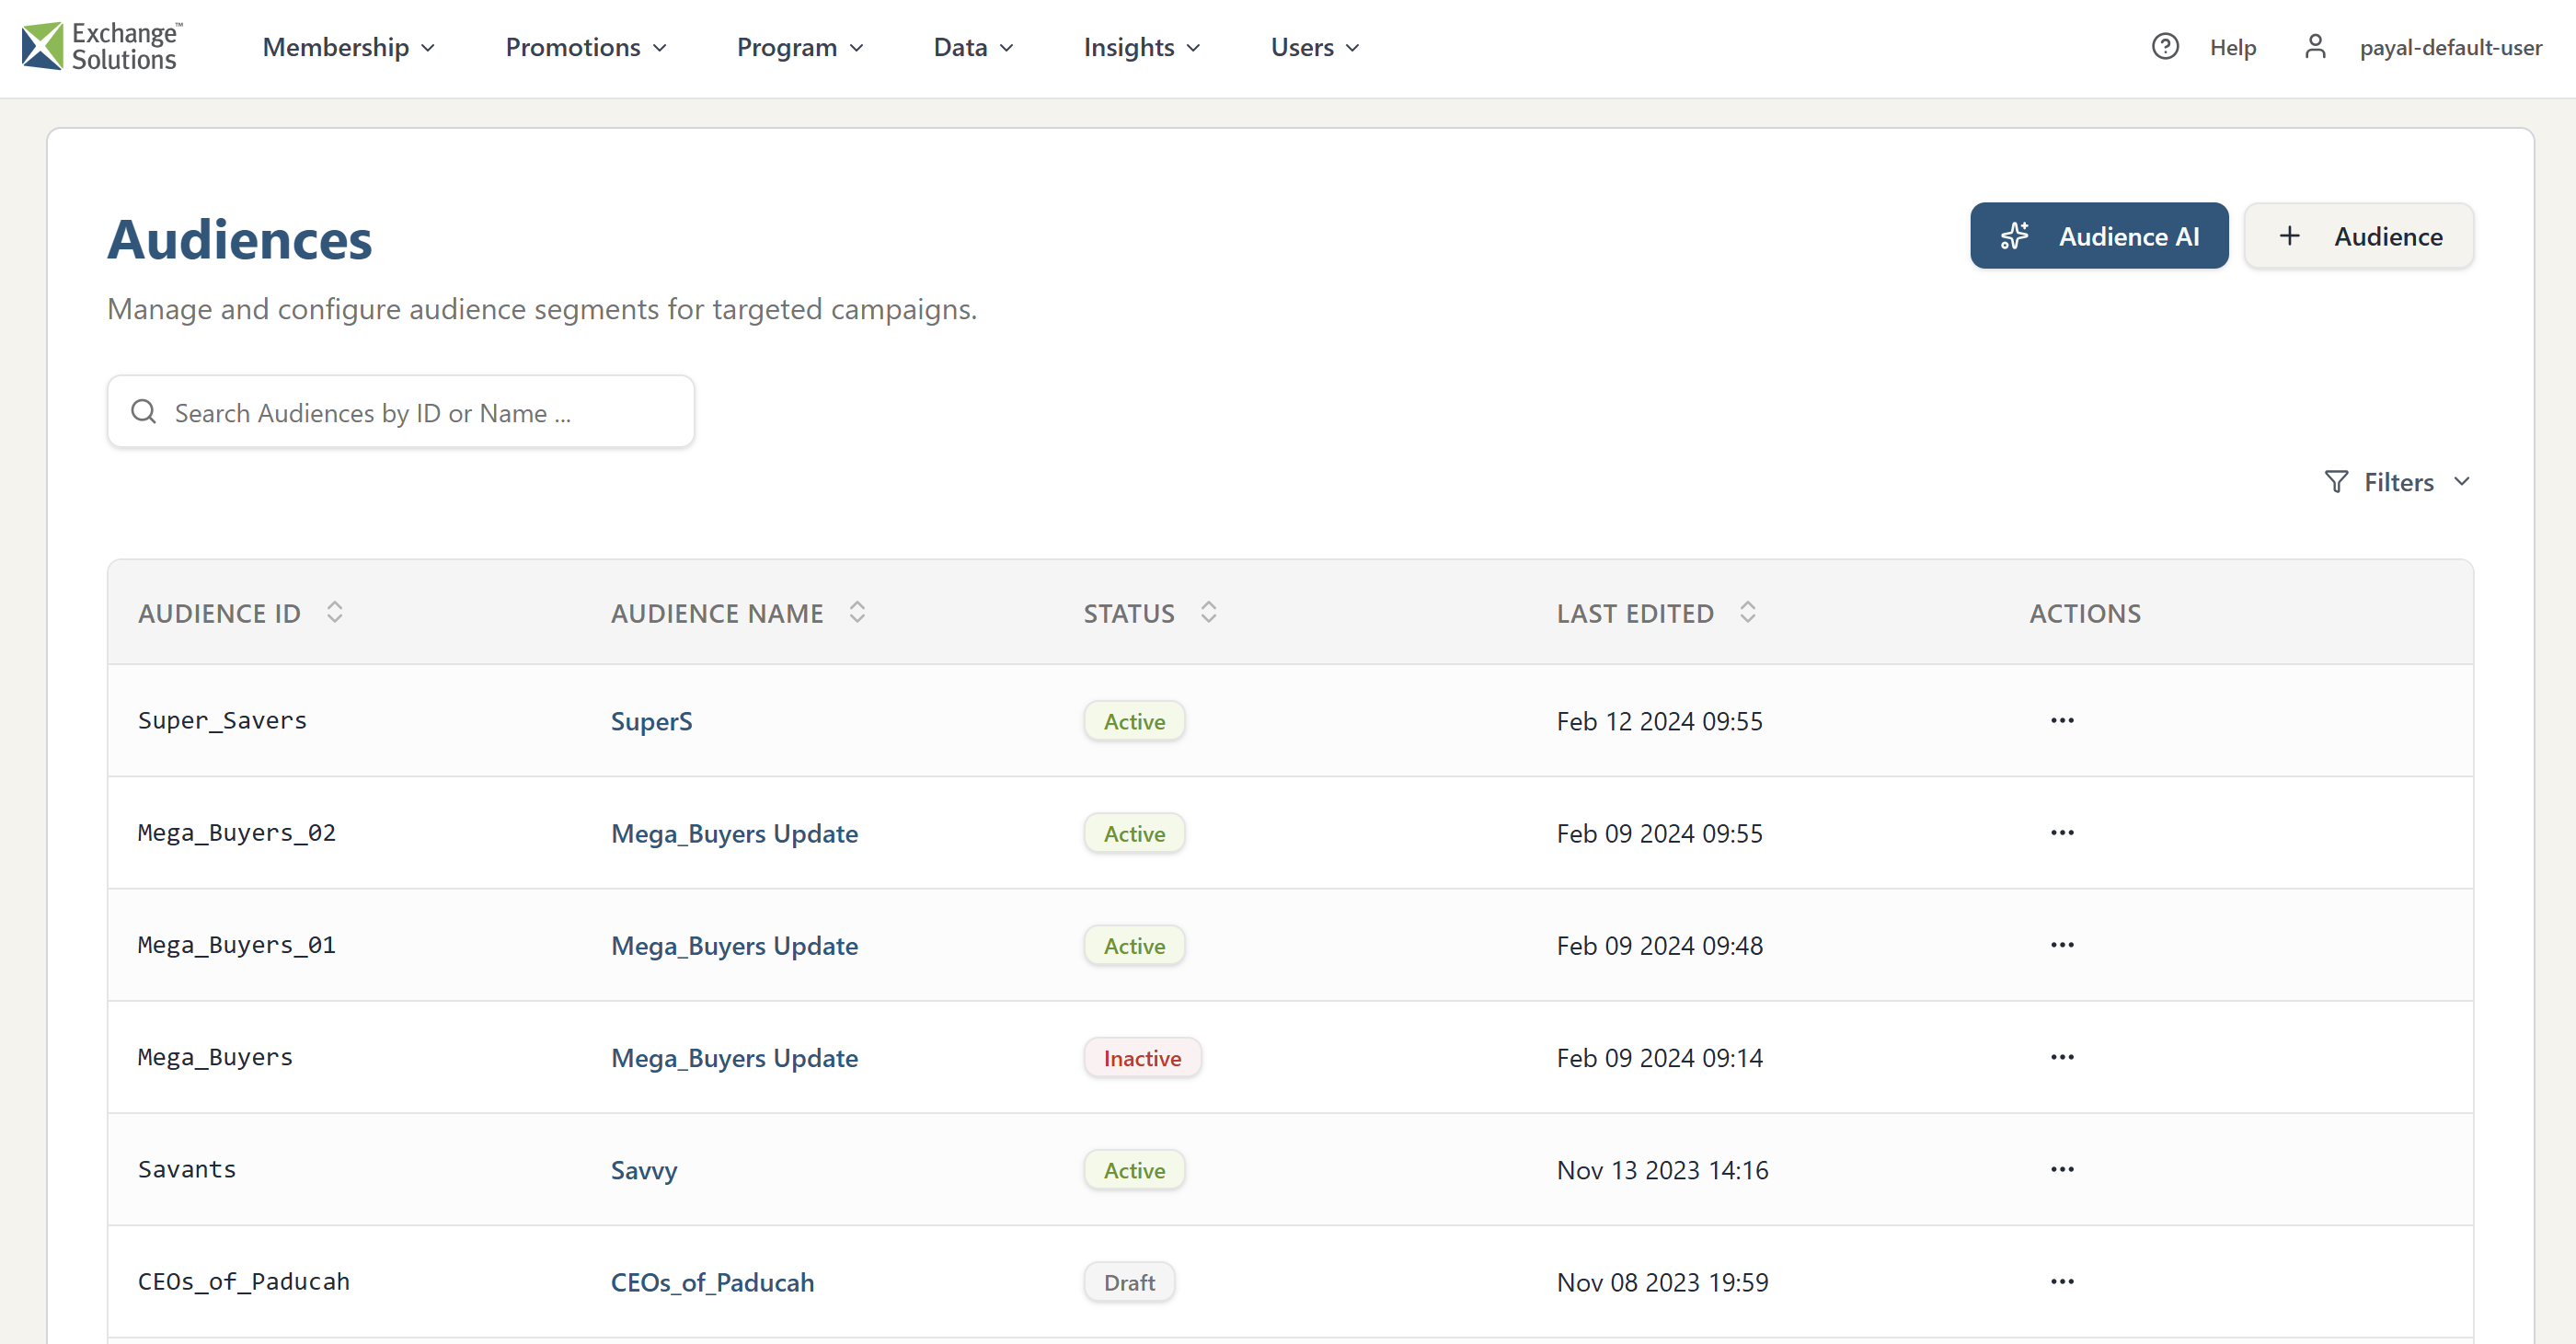
Select Membership > Audiences. If required, select a business unit in the sub-menu. The Audiences page opens.
-
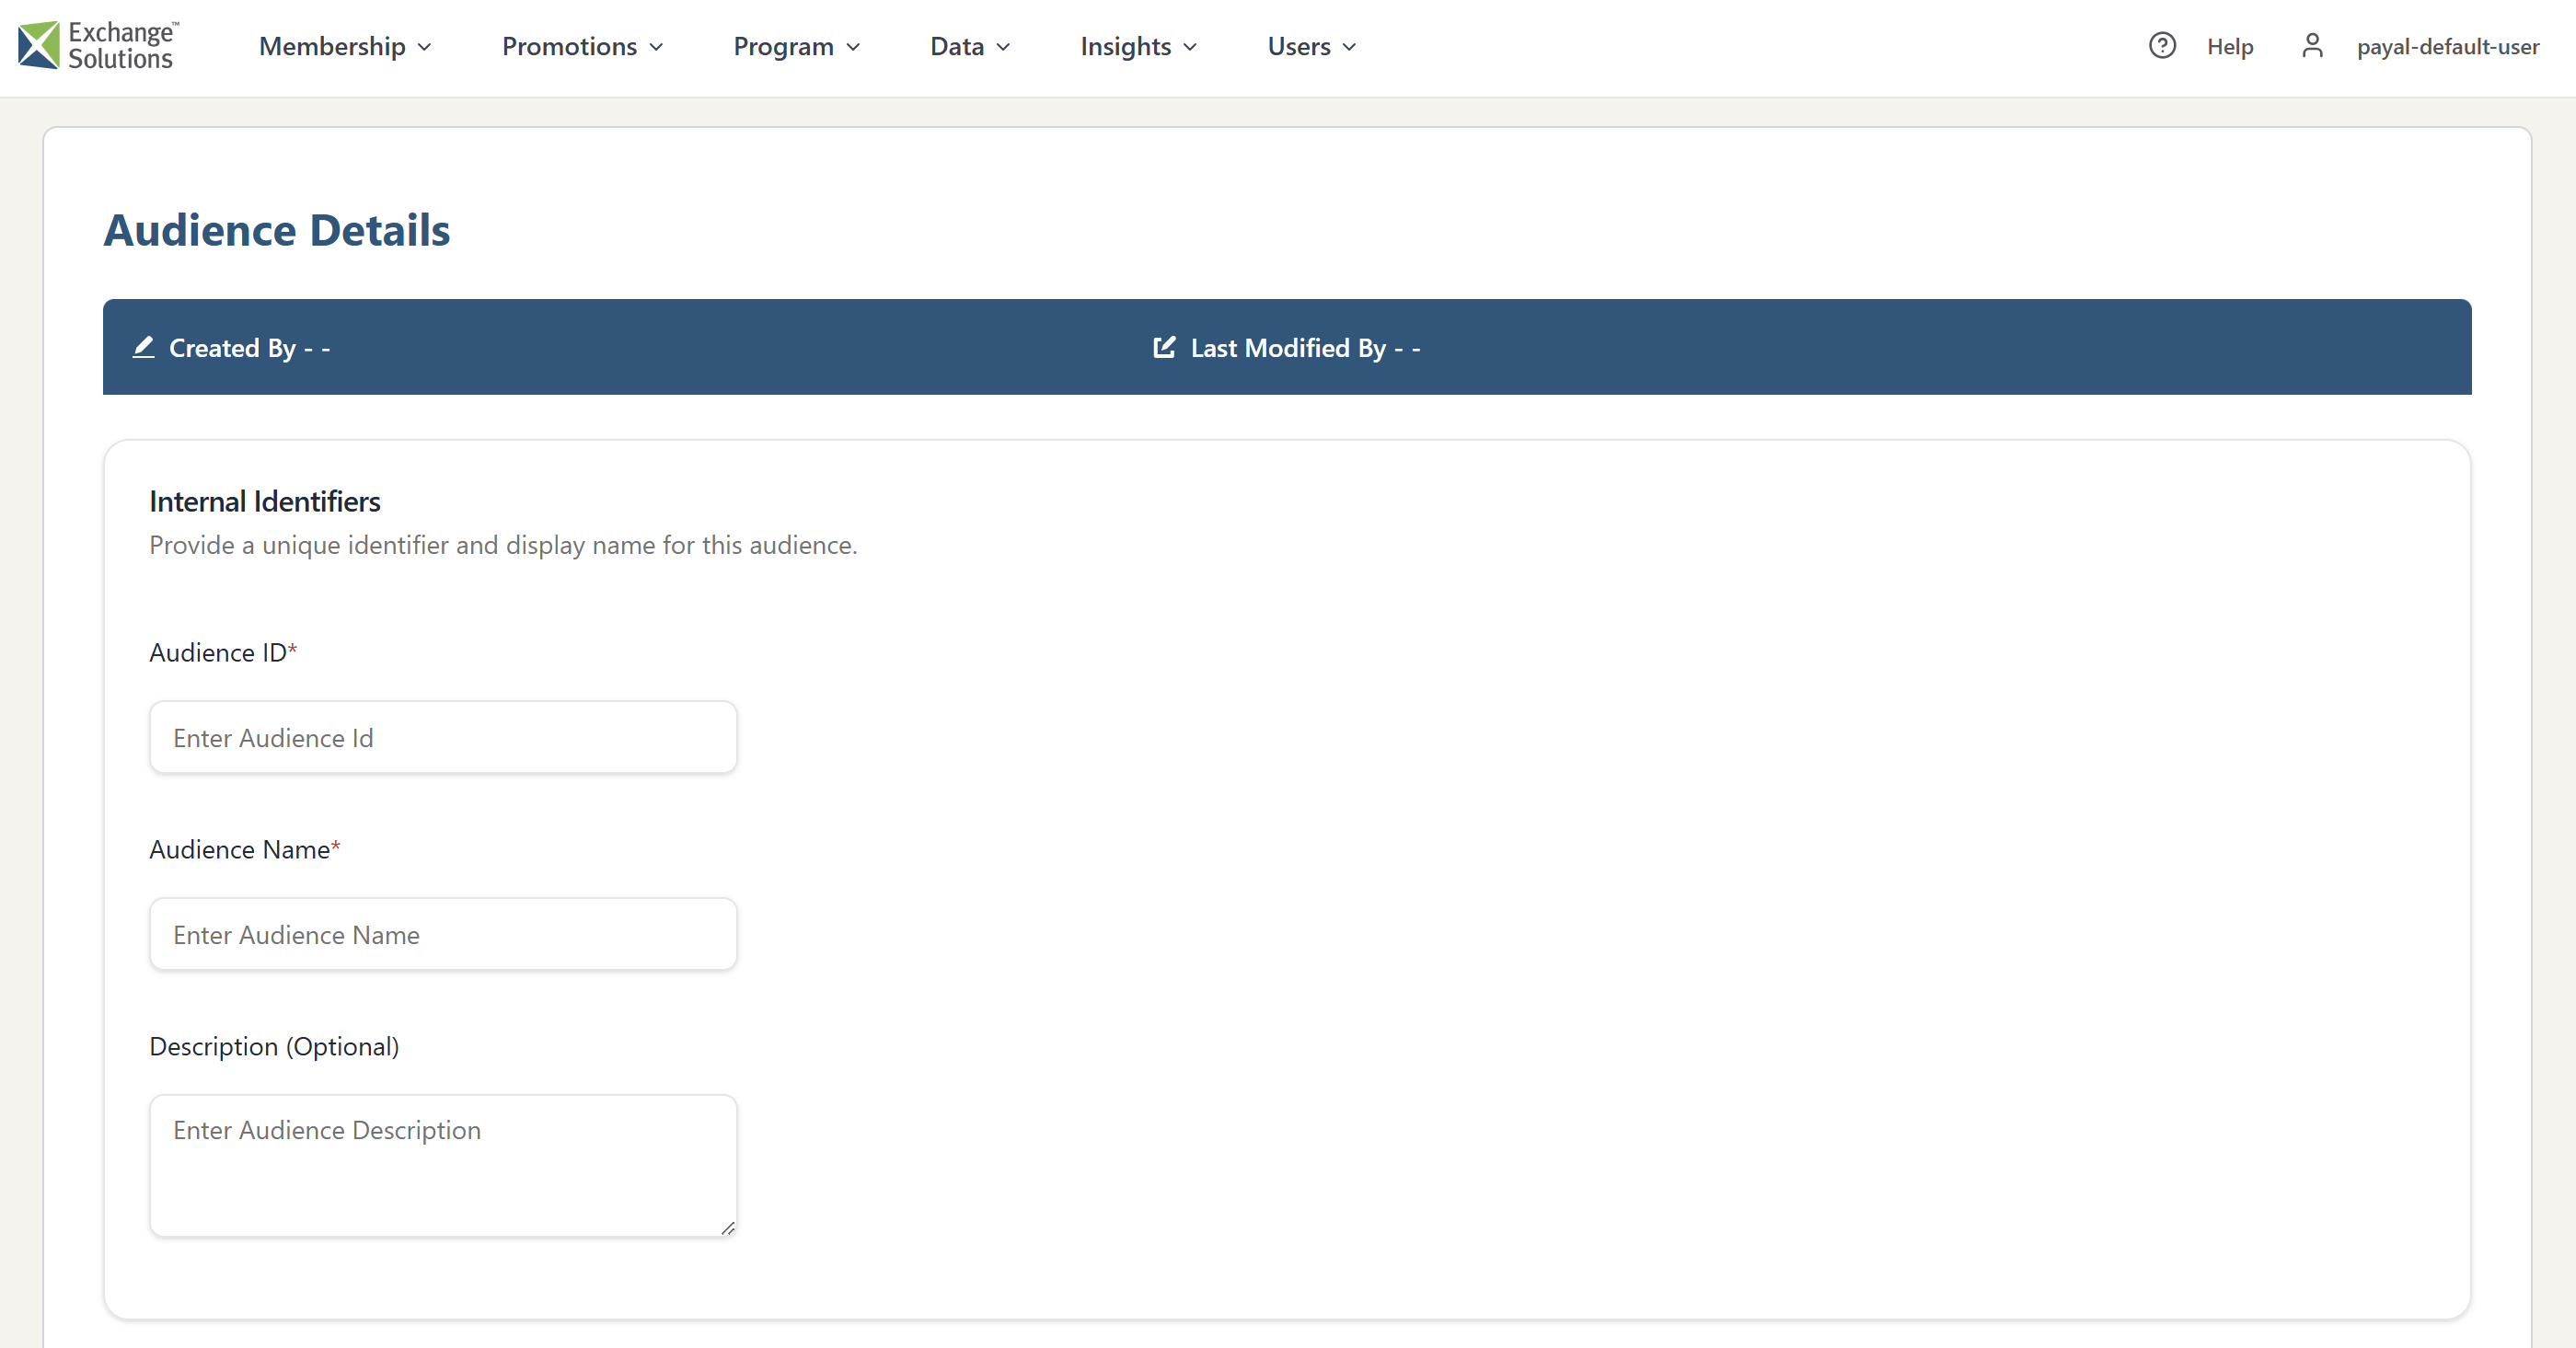
Click +Audience on the Audiences page. The audience builder opens as shown in the image below.
-
In the Internal Identifiers section, enter the audience ID. The audience ID must use 3 to 128 alphanumeric characters and underscores only. This is a mandatory field.
-
Enter the audience name. The audience name must use 3 to 128 alphanumeric characters, allowed symbols (.@+-$&'), French letters, and spaces. This is a mandatory field.
-
In the Description field, you can optionally enter a description for this audience.
-
Set up the audience logic. See the section below for more information. Note that setting up audience logic isn't required to save a draft if you're willing to use the defaults shown.
-
Once the audience logic has been set up, click Preview Target Count to get a count of how many members will be in the audience.
-
Click ... More > Save Draft (to save a draft that can be edited but can't yet be used with offers or in campaigns) or Publish (to save an active, enabled version of the audience ready for use). If saved as a draft, all fields and controls can still be edited except for the audience ID. Once an audience has been published, only the audience name and description can be changed; the audience ID and audience logic can't be edited.
-
In the confirmation window, click Publish. The audience appears at the top of the list on the Audiences page.
Audience Logic
As part of the setup when creating an audience, the audience logic can be configured to incorporate various profile attributes or purchase history to determine which members will be part of the audience. The following steps show how to set up targeting on profile attributes and purchase history options:
Audience targeting only supports static targeting. Dynamic targeting (assembling the audience when the offer begins) isn't supported.
-
For profile attributes and purchase history, choose one of the following:
-
Profile Attributes and/or Purchase History: Set up the audience targeting query to include both profile attributes (such as age, gender, postal code, employee status, province or state, payment card provider, last offer acceptance date, total points balance, a member score, and so on) and details of the member's purchase history (for example, the products purchased, the amount spent, and the applicable timeframe).
noteSelectable profile attributes are only shown for the business units for which they are configured; in some cases, this may be multiple or all business units for a client.
-
Profile Attributes ONLY: Set up the audience targeting query to include only profile attributes (such as age, gender, postal code, employee status, province or state, payment card provider, last offer acceptance date, total points balance, a member score, and so on).
-
Purchase History ONLY: Set up the audience targeting query to include only details of the member's purchase history (for example, the products purchased, the amount spent, and the applicable timeframe).
Only the relevant parts of the query interface are shown once you have made your selection. If you change the logic selection, a confirmation window opens. Click Clear Targeting to confirm your choice.
-
-
Set up your query or queries. For each entry, you can select an attribute, an operator that compares the attribute value to the one you provide, and one or more values (for example, for a Province attribute: Province is In one of ON, MB, or QC; or a member score built in the Scoring and Intelligence section of the Console). You can define the relationships between conditions (AND or OR), add conditions, and add groups to build your query. Repeat for any other attributes to be defined. The following is an example of a query built for both Profile Attributes and/or Purchase History.
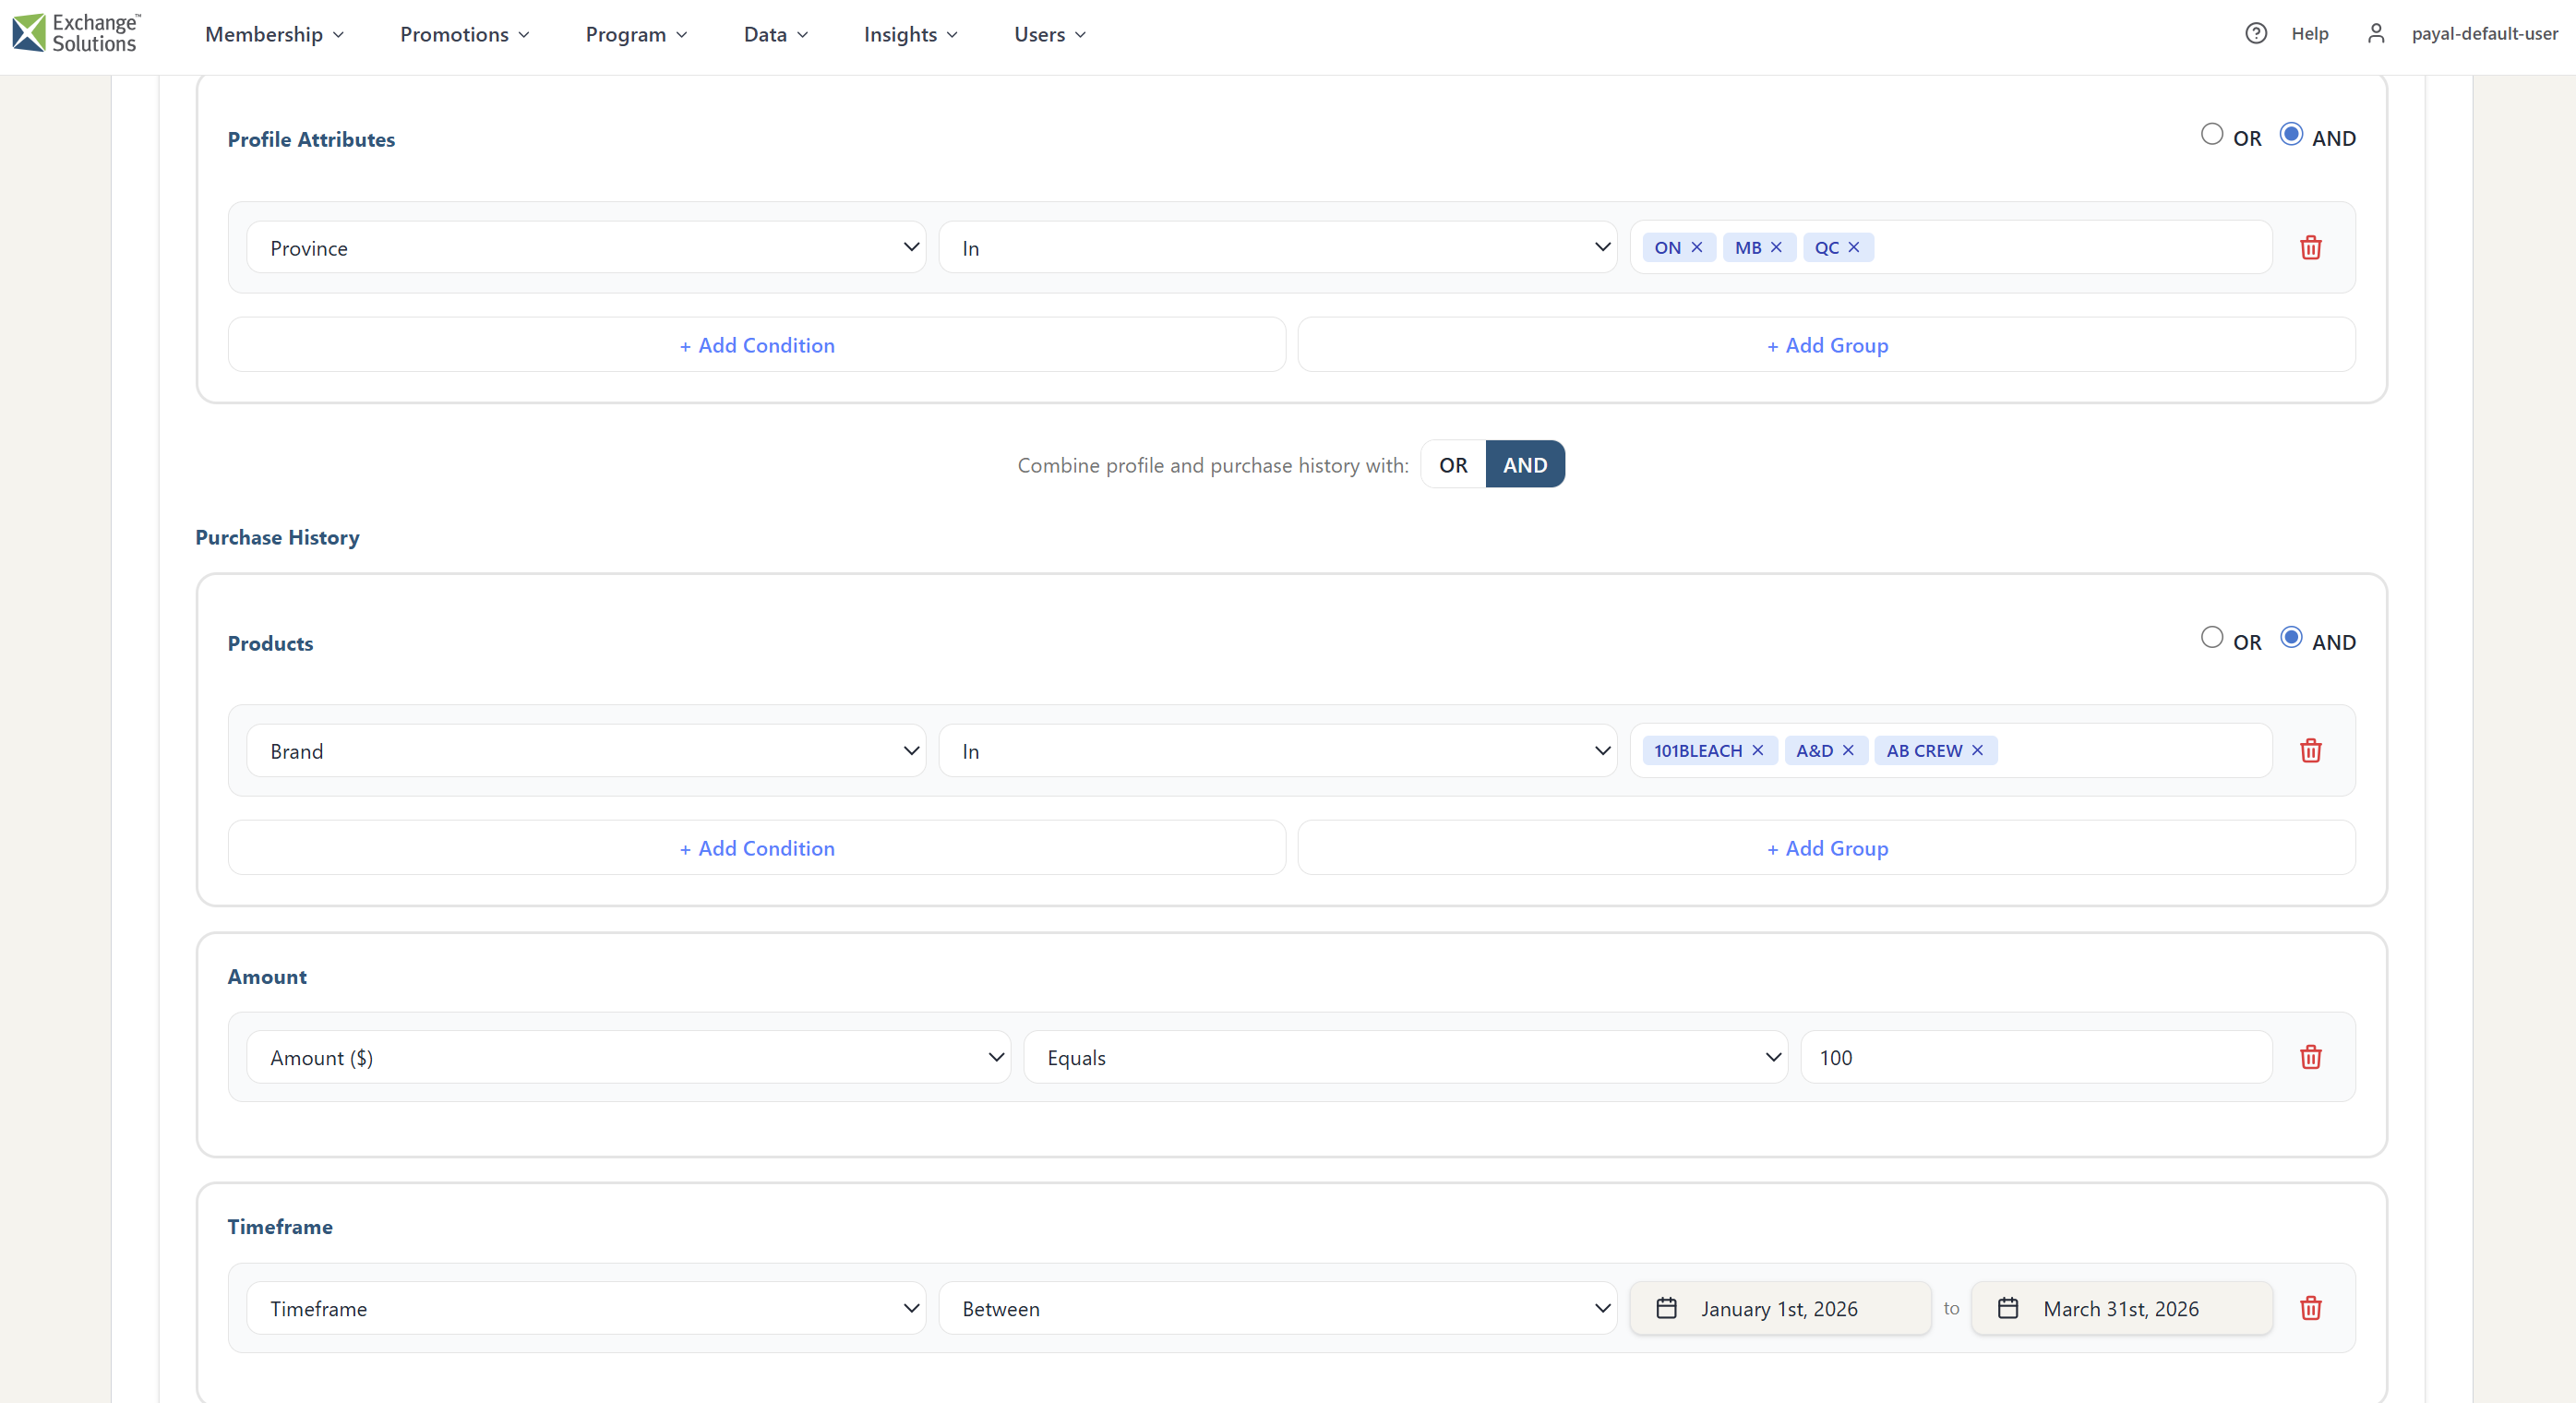
Queries can be more complex than this example, depending on the conditions and groups added and the relationships between them.
- Select whether to view the JSON code generated by the query as configured (Enable query preview) and whether to show an estimate of how many members will be targeted (Preview Targeting). The results are shown below. Note that the estimated count is timestamped, as changes to membership can take up to 24 hours to propagate through to the audience.
Set up an audience using a member score
- Retrieve the relevant information from the member score. For example, if you have a member score based on custom buckets, navigate to the Member Scoring & Intelligence page (Membership > Scoring and Intelligence, then select a business unit if applicable). On the Action menu for your chosen score, select View.
- Scroll down to the AI Description field in the details section, which provides information about how the score has been set up. If the distribution method is Deciles, the score has ten equal segments numbered 1 to 10. If it is Quartiles, there are four equal segments designated 1 to 4. If the score uses custom buckets, there are a number of segments, each with a unique name. Record this information.
- Navigate to the audience builder (Membership > Audiences, select a business unit if applicable, then click +Audience).
- Enter the audience ID and audience name (both required) and a description (optional).
- To select a member score, you need profile attributes, so choose either Profile Attributes and/or Purchase History or Profile Attributes ONLY as required.
- Select the logical operator (OR or AND), then in the Profile Attributes dropdown, select your member score in the Member Scoring & Intelligence section of the list.
- Choose the operator (Equal/Not Equal or In/Not In), then enter the segment name or number you want to target.
- Make any additional selections to complete targeting.
- To view the resulting query, select the Enable query preview checkbox. To see how many members are targeted, click Preview Targeting.
- Click Save Draft (if you plan to make further changes) or Save.